The past week I have been putting my technical skills in mobile application to the test. I feel that I must elevate my abilities in this department to a professional level in order to be an assist to any future companies I work for in the future. Furthermore, I may be building a mobile application (pending user research) for my thesis so I want to ensure that I am more than capable to realise goals I set for myself. I have been anticipating mobile development since my first semester of my Masters. I enrolled in Object Orientated Programming in order to refresh and enhance my ability in Java and OOP in general. Continue reading →
This goal of this group project was to design and develop an interactive visual artwork with OpenFrameworks, demonstrating the skills we had learned using XCode such as MIDI, keyboard entries, vectors, Haarfinder, Vidgrabber, ofMesh, VBO, classes.
Concept
Our project deals with the visualization of sound, specifically visualizing the human voice in an interactive and immersive way. The driving idea behind this piece is relative to how we use specific communication channels in order to perceive sound and visuals. Ordinarily, it is the auditory system that deduces sound characteristics where as visual perception calculates what we see. Our project intends to explore the crossover that can occur between these two. The bahaviour of the visual is completely dependent on the interaction of users. Results in output vary. It adds an interesting element to the mix when you consider how different people’s interactions may contrast and what the resulting visuals will look like. We wanted to emulate the visual process of hearing in our piece. Real life vibrations in the air come to fruition through our ‘exploding sphere’.
User Vocal Interaction
When it is at peace
Design
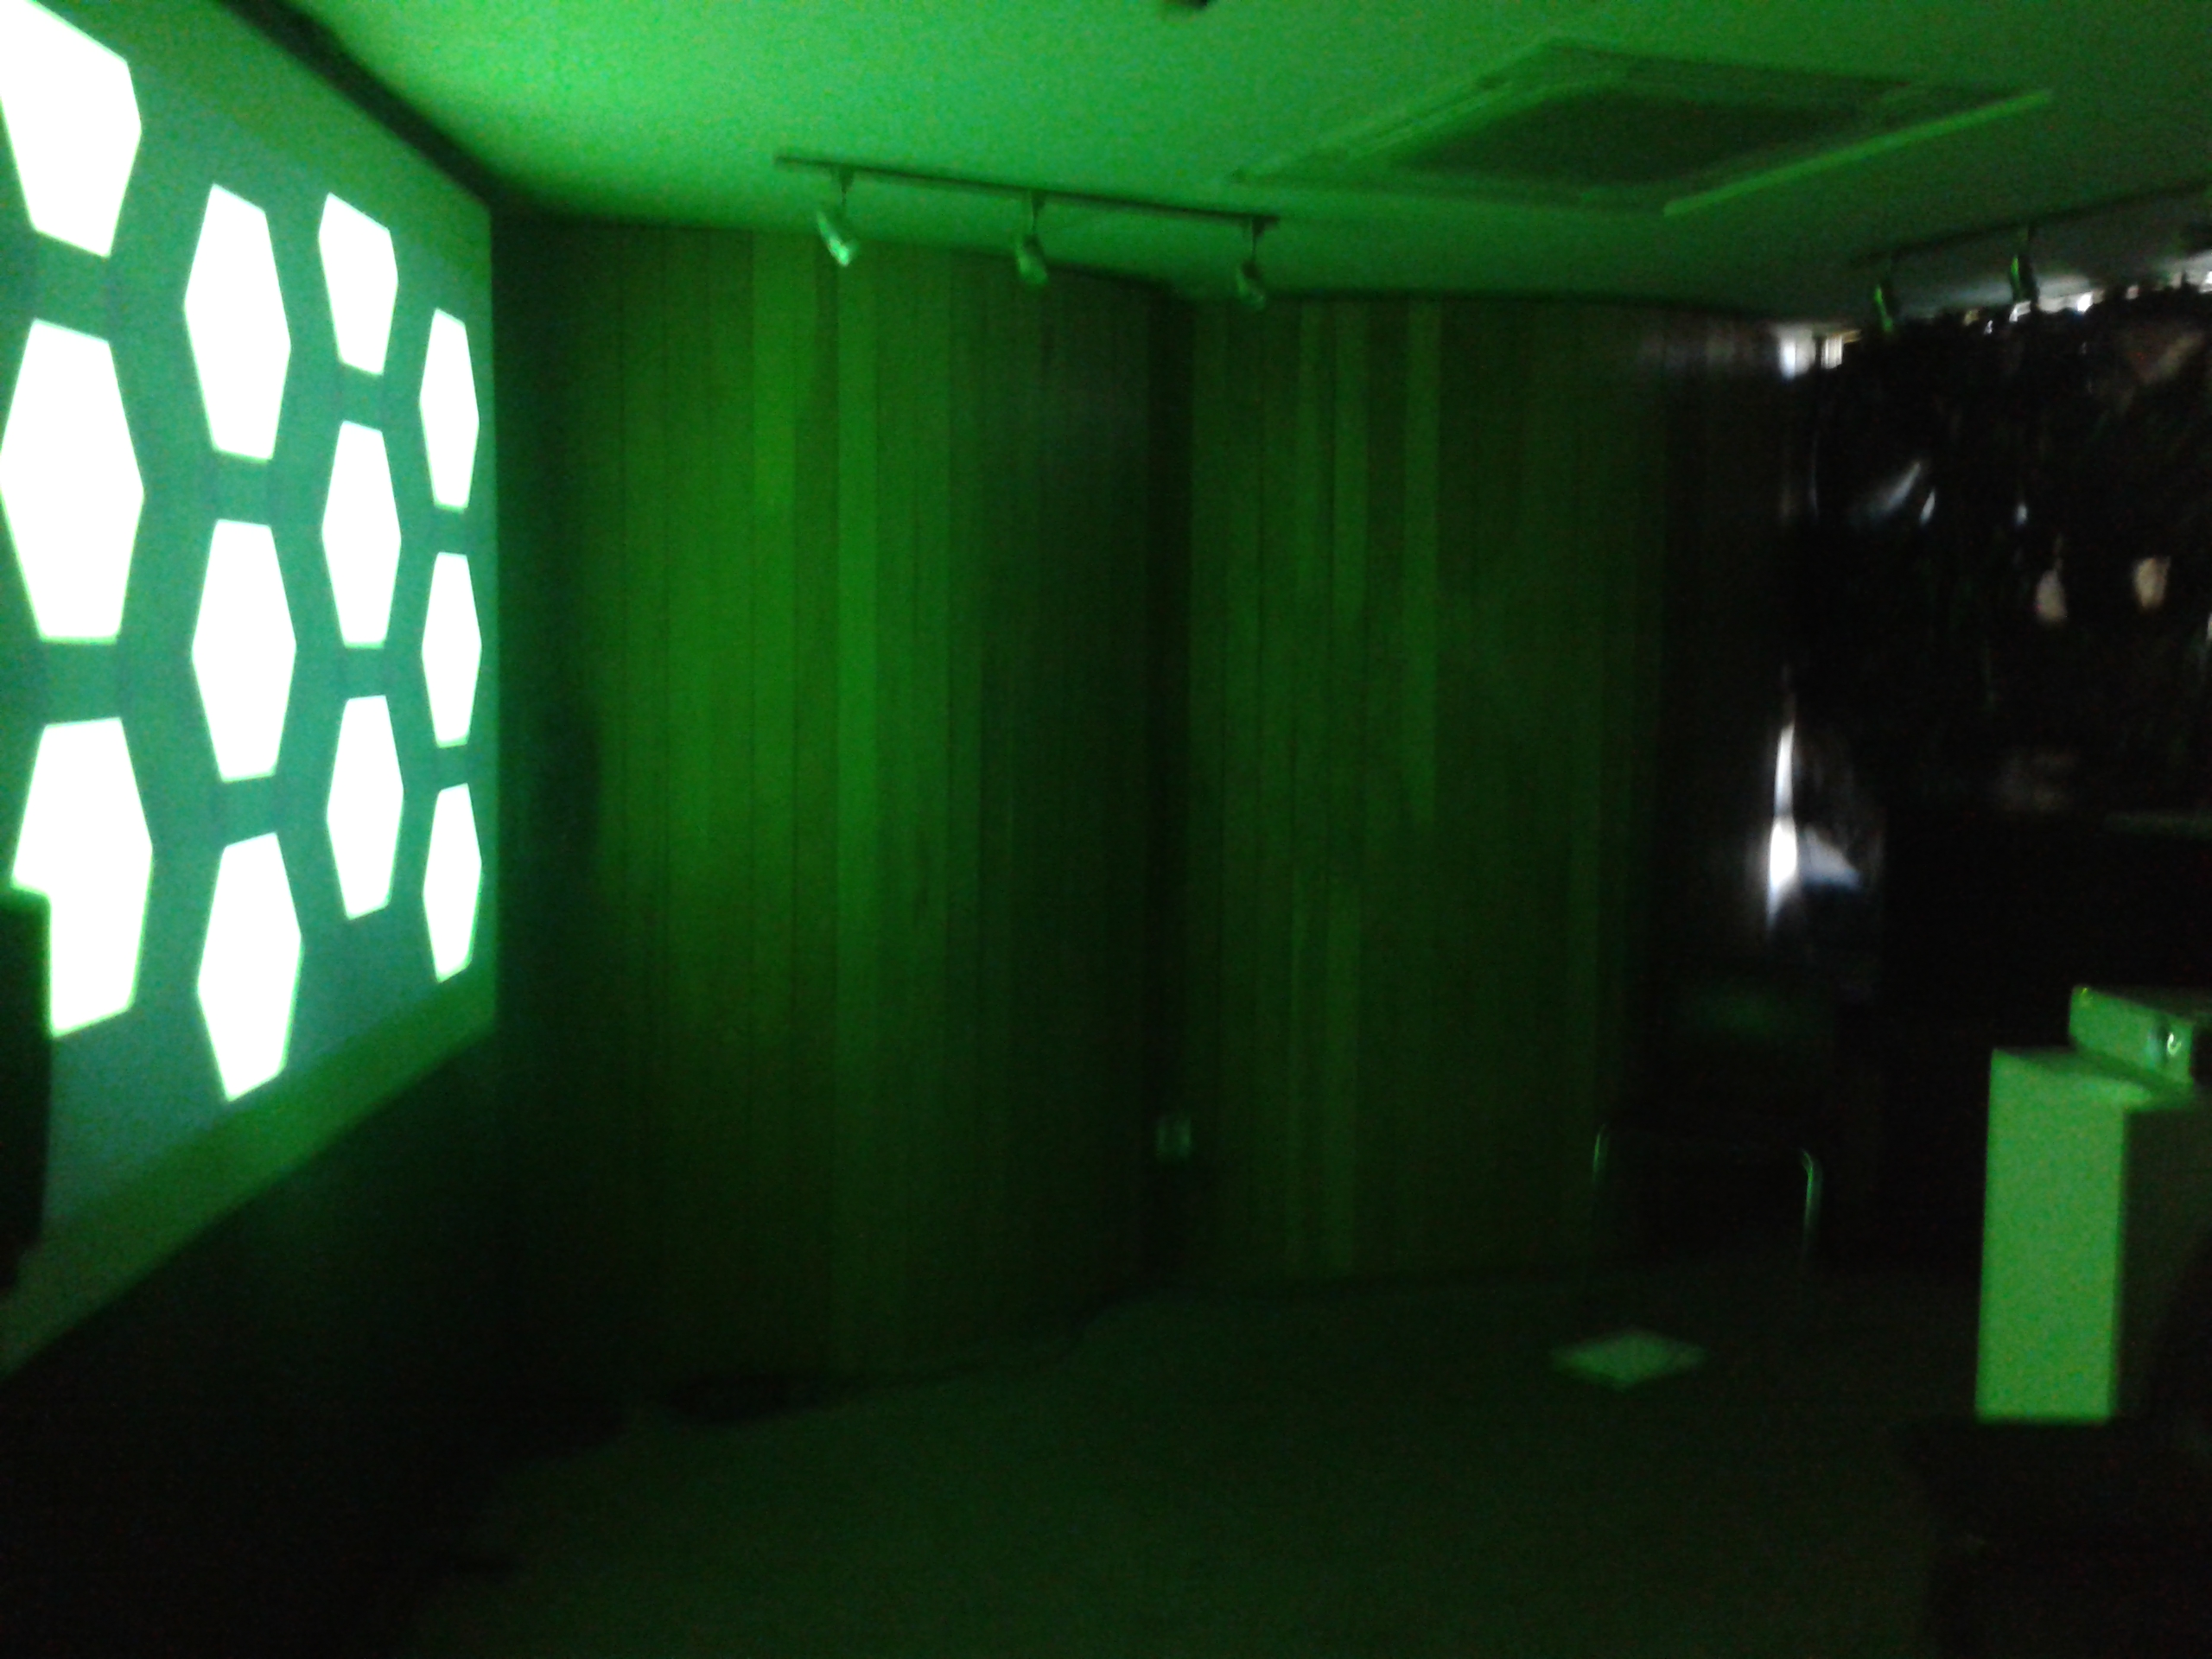
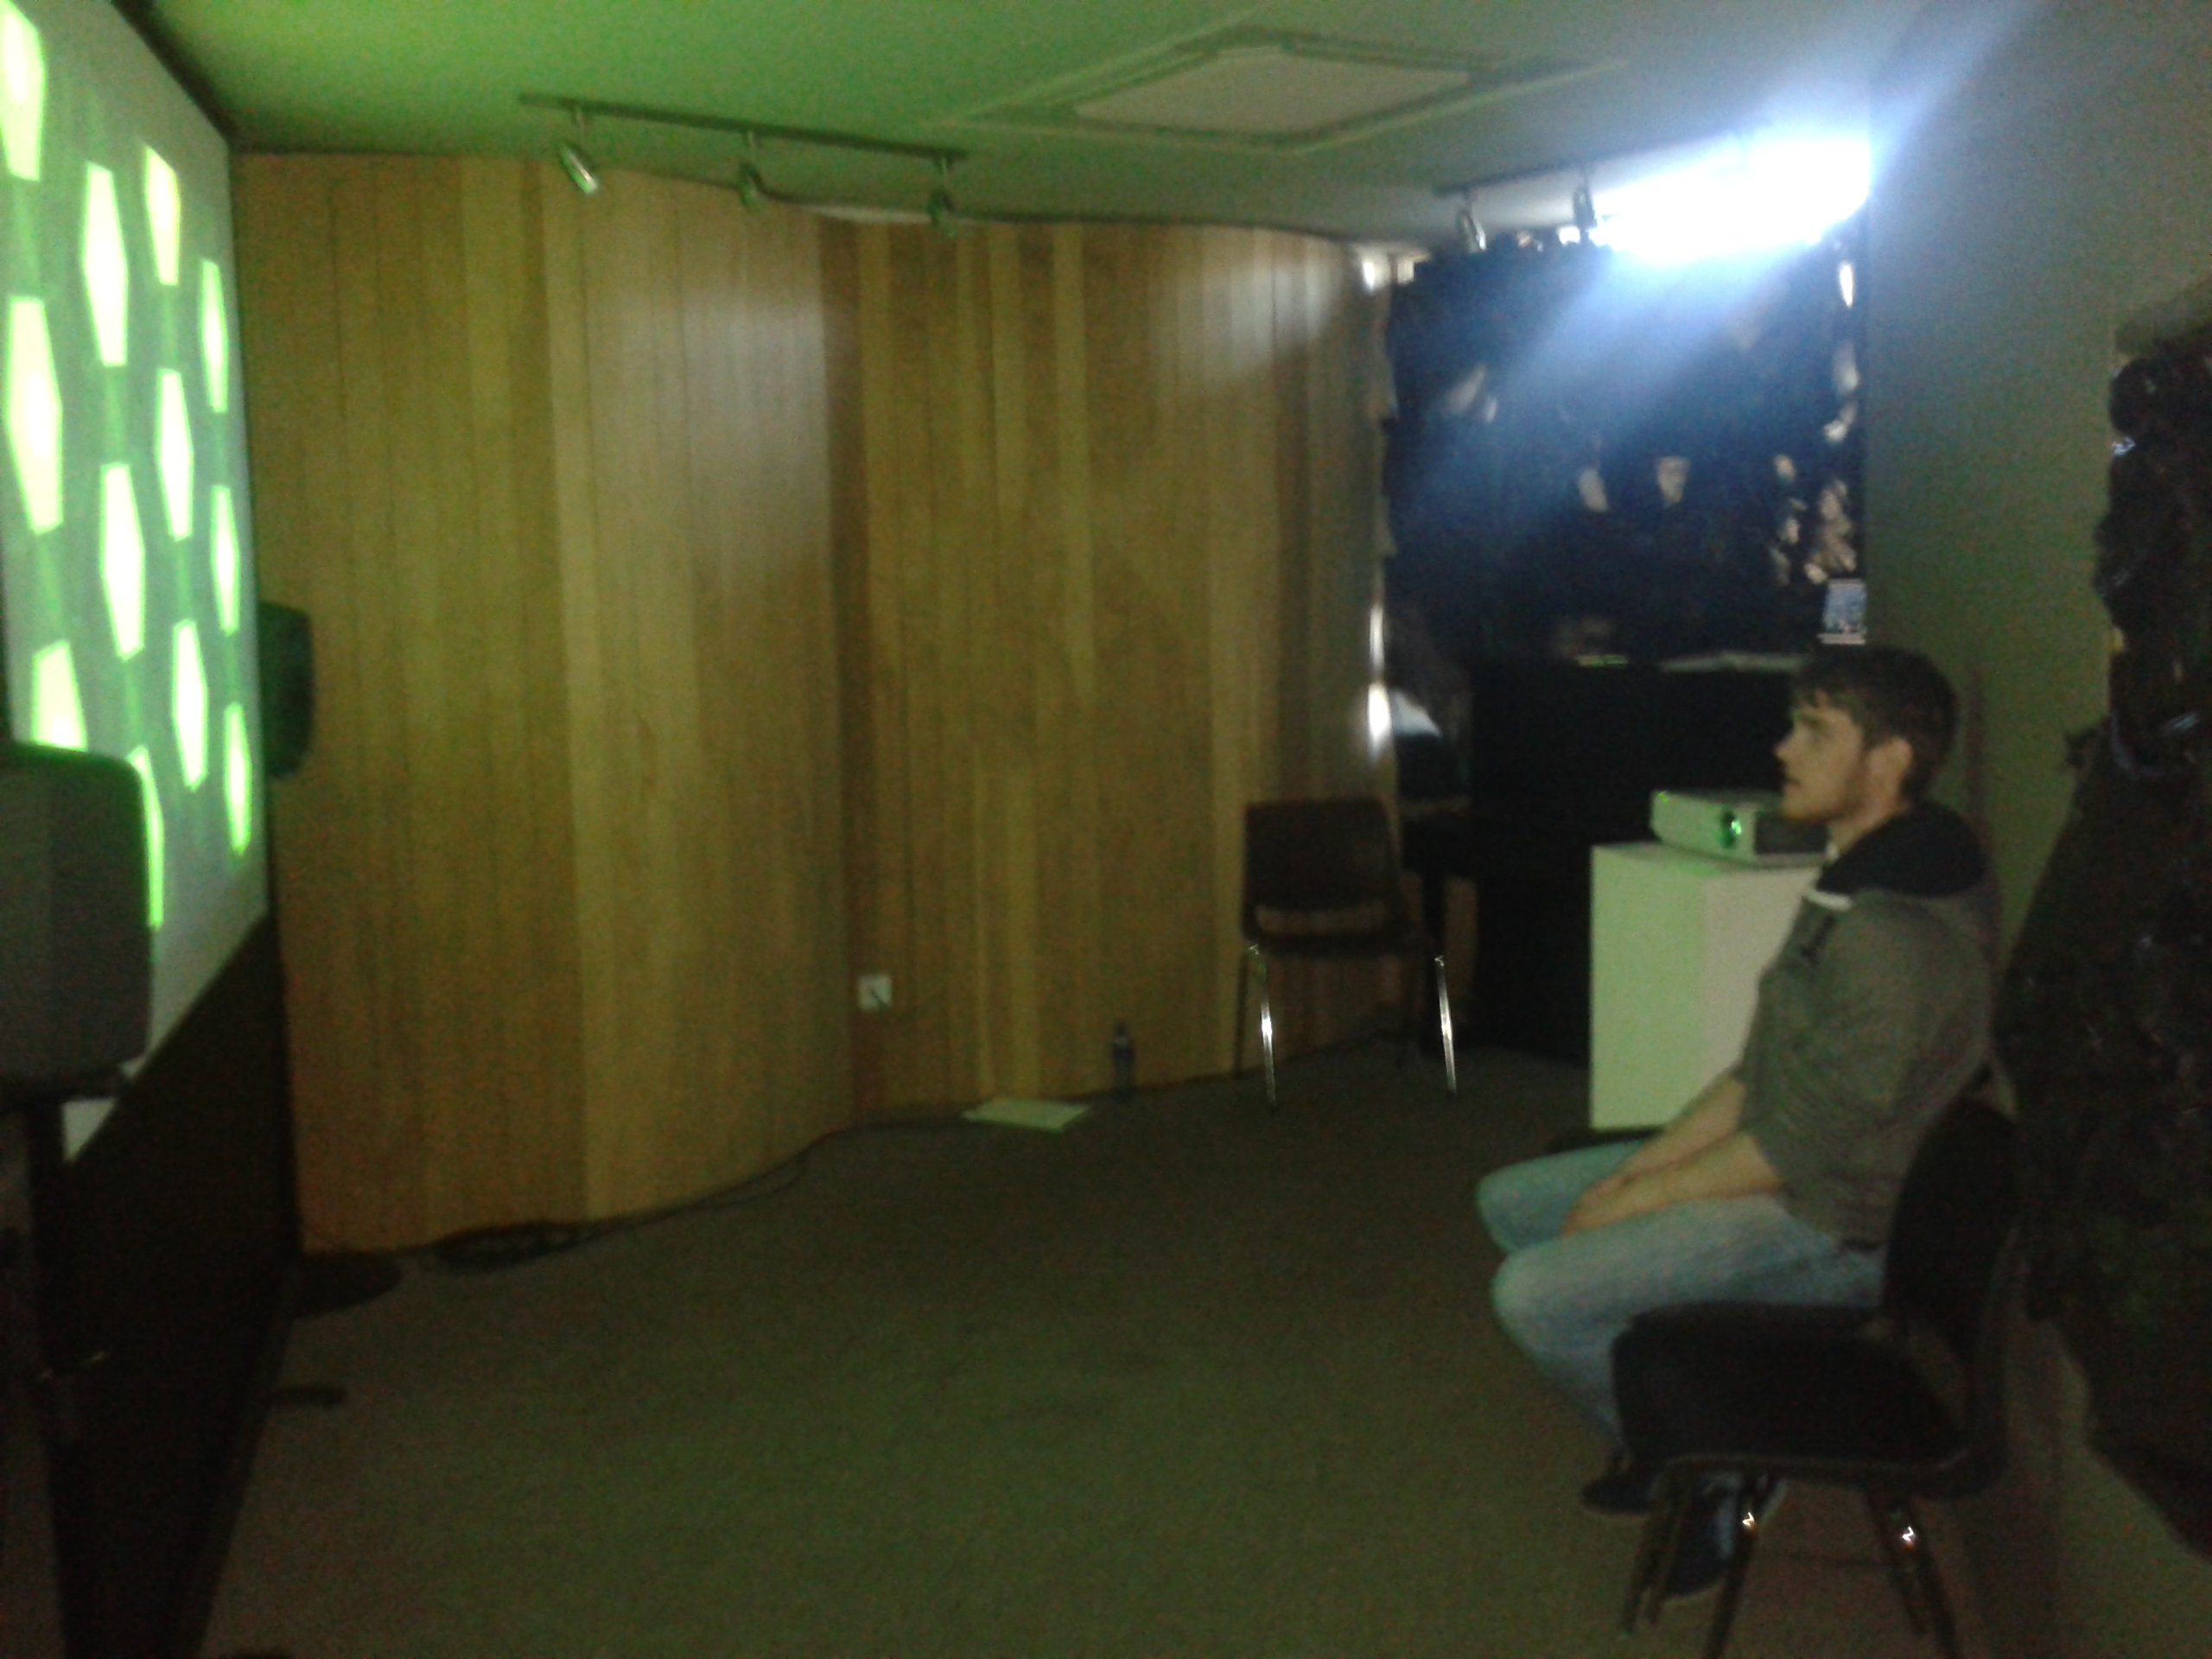
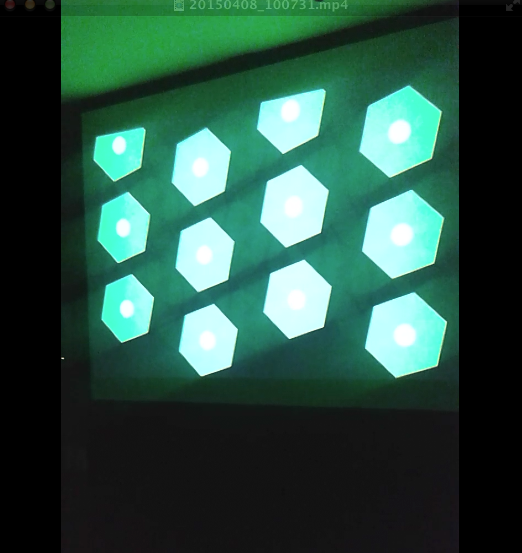
The design of our visualization aspires to be simple and concise in an effort to make how the user connects their vocal input to the mirrored abstract visual on screen seamless. There are two key components that make up the output: the 3D sphere and a moving graph. These exist virtually within a 3D spherical grid space, introducing an element of depth. Focusing on the sphere first, it rotates on a fixed position and is made up of a vector of triangles that can be split. How it behaves is dependent on the ofSoundStream. As amplitude is monitored, it is scaled and mapped in real time. The scaled volume data determines the behaviour of the triangle vectors that make up the sphere. The louder the incoming sound, the greater distance the triangles disperse. Unless the system is in Mode 3, the sphere will always resume its original shape.Additionally, three light sources shine upon the circumference of the sphere enhancing the 3D presence using ofLight.
The graph on screen acts as a secondary source for audio representation. The graph collects the recent activity of sound within the buffer, iterating through the data volHistory, and deleting the oldest input data. It exists within the background of the piece. This is also achieved using a vector and further maintains the bond between sound and visuals. Information display moves from left to right.
There are also various states that the piece can assume. Ultimately, the behaviour of the shape shall represent user interaction but aesthetics and dynamics can be altered using the mouse and keyboard. There are three modes that the system can be in. Mode 1 uses a .png image as the texture of the sphere. Mode 2 uses the live webcam feedback as the texture while Mode 3 uses the former .png image. Mode 3 differs in dynamics because as the triangles disperse they do not reform to the original shape, introducing an interesting deconstruction of the shape that will remain until state change.
In addition to being able to shift between these modes using the left and right keys, a user can choose the amount of triangle splits by selecting a key with 1-4, four consisting of the largest amount of triangle splits. The user can also press the mouse to control the speed of rotation. The speed is relative to the position of the cursor on the X-axis while pressed. A series of Booleans also turn on and off states such as wireframes, points of splits and fill of the shape.
For this project, I created a standalone generative visual to run in fullscreen on a computer screen of any resolution. This was done using Processing. The visual is open‐ ended so that it can run indefinitely. In the initial stages of my project, I researched what kind of animation could be most engaging to a viewer. I wanted to create something that looped over and over but changed its variables such as colour, scale, and direction of movement repeatedly. I wanted to create some form of kaleidoscope in its simplest form. The image changing but previous elements of movement remain. I drew influence from the kaleidoscope works of Jordi Bofill of Cosmo Arts.
The graphic design is made up of five stars that each have an ellipse with in the center of them. These stars and ellipses all have outer stroke colours also. The colours of each star and ellipse are the same(bar the center), yet it’s the outer strokes and how they behave with movement are what makes this visual interesting. It is the center ellipse that is considered the center focus. With this ‘screensaver’ there are numerous dynamics. The piece is always zooming in and out. It is continuously rotating (based on the key selected for desired direction). It can be clicked and dragged to change the center points of the image. What is most interesting is the random colour changes to the outer strokes and the diameter of the center ellipse. Pressing space also resets angle and zoom to begin again. Its behaviour is somewhat similar to Spiro graph.
Using ‘if’ statements I was able to implement limits to the dynamics. It can only scale so far until the if statement sets a boolean true and changes the value of the rate I have designed causing the scale to either increase or decrease. The direction keys could also serve as a threshold as they dictate with direction/angle the image should move.
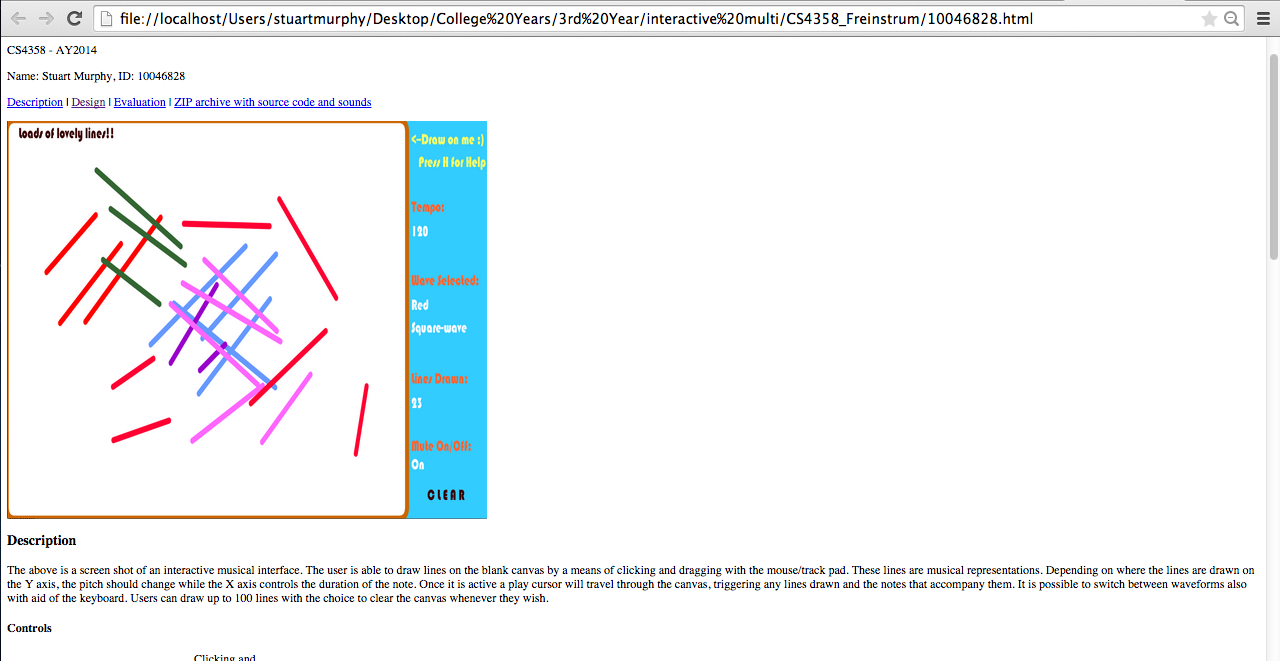
The aim of this project was to design, code, test, evaluate and document an application written in Processing: drawplay.
The application should has a window (a canvas) where the user can draw lines with the pointing device (mouse, trackpad).
Each line represents a simple synthesised sound, where the length of the line is the duration and the vertical is the pitch (the fundamental frequency).
A line in the left half of the window will play before a line in the right part of the window, based on a play-cursor (a vertical line) moving across the window from left to right.
When the play-cursor reaches the right hand side of the window, it will reappear at the left hand boundary and continue to play.
Play/stop is controlled by pressing the space-bar. It is possible to change between 5 different colours of the lines drawn by the user, by pressing the keys 1-5.
Each colour represents a specific timbre, red:sinewave, blue:square wave, etc.
The playback speed, i.e. how fast the play-cursor moves across the screen, can be changed by pressing up-arrow/down-arrow keys.
The source code of the finished application was uploaded to my individual web site on richmond.csis.ul.ie, placed in a simple web page together with a screenshot of the application.
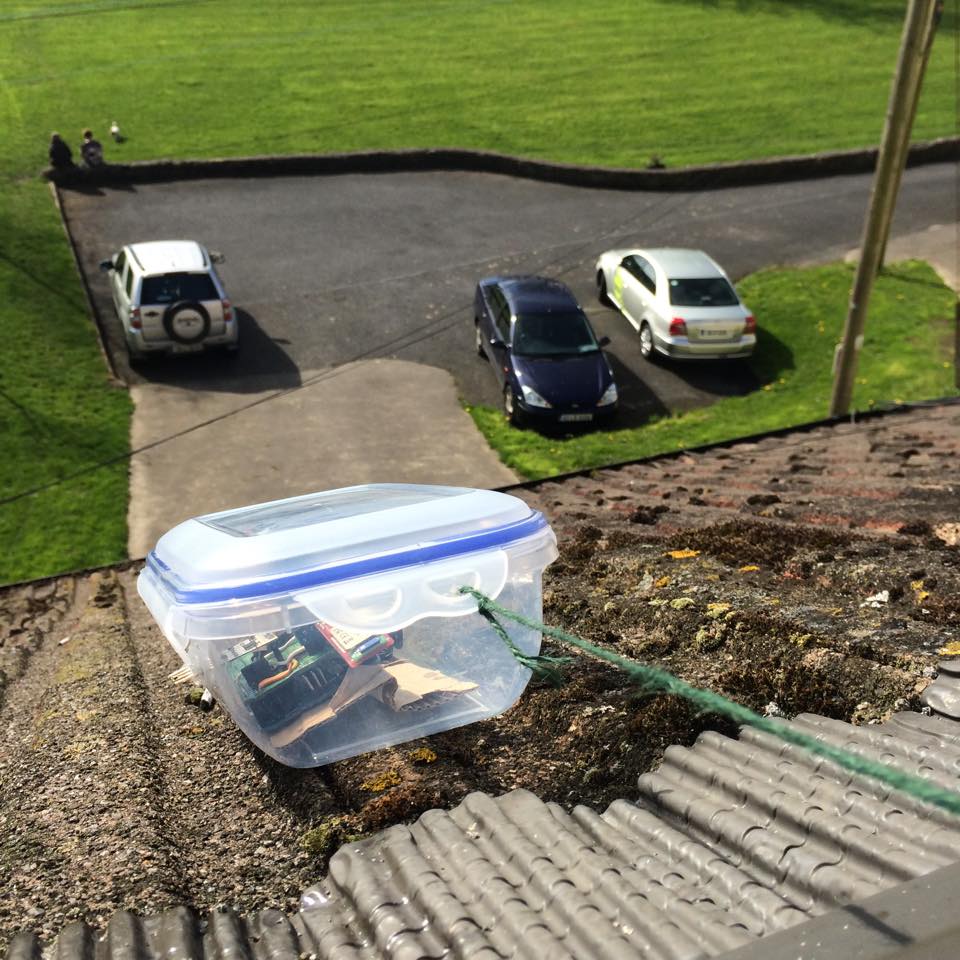
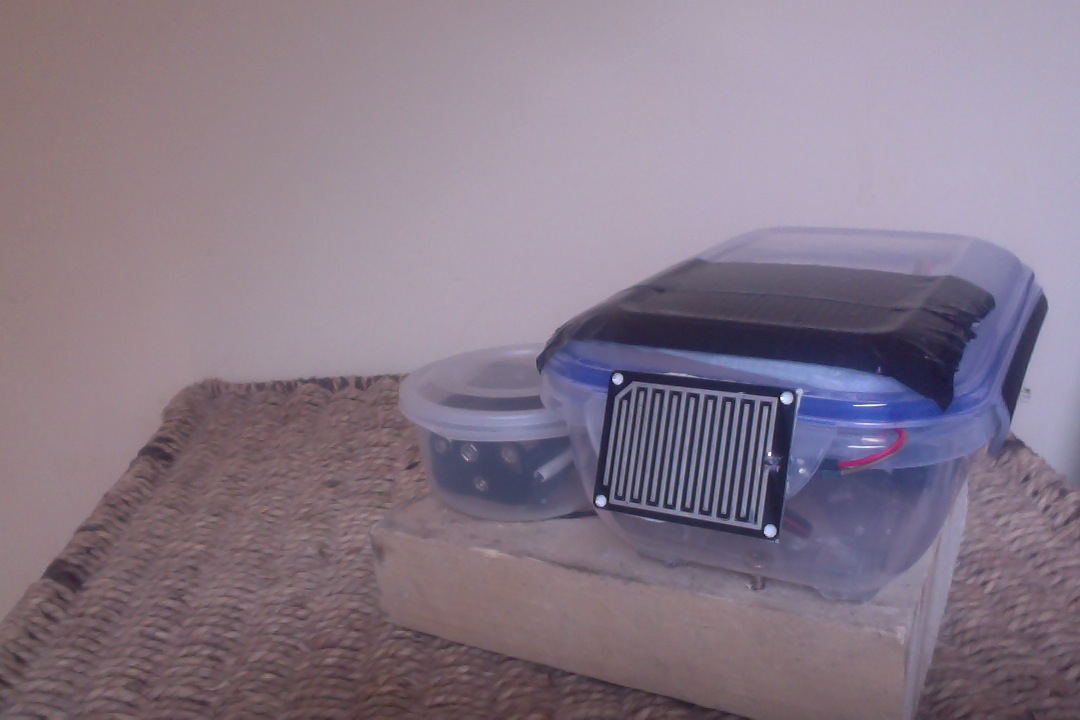
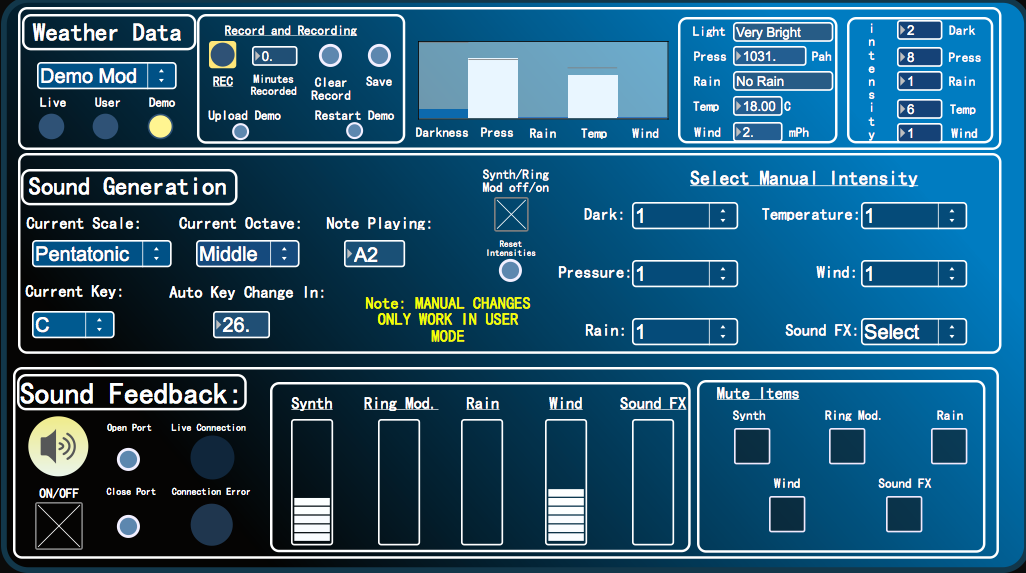
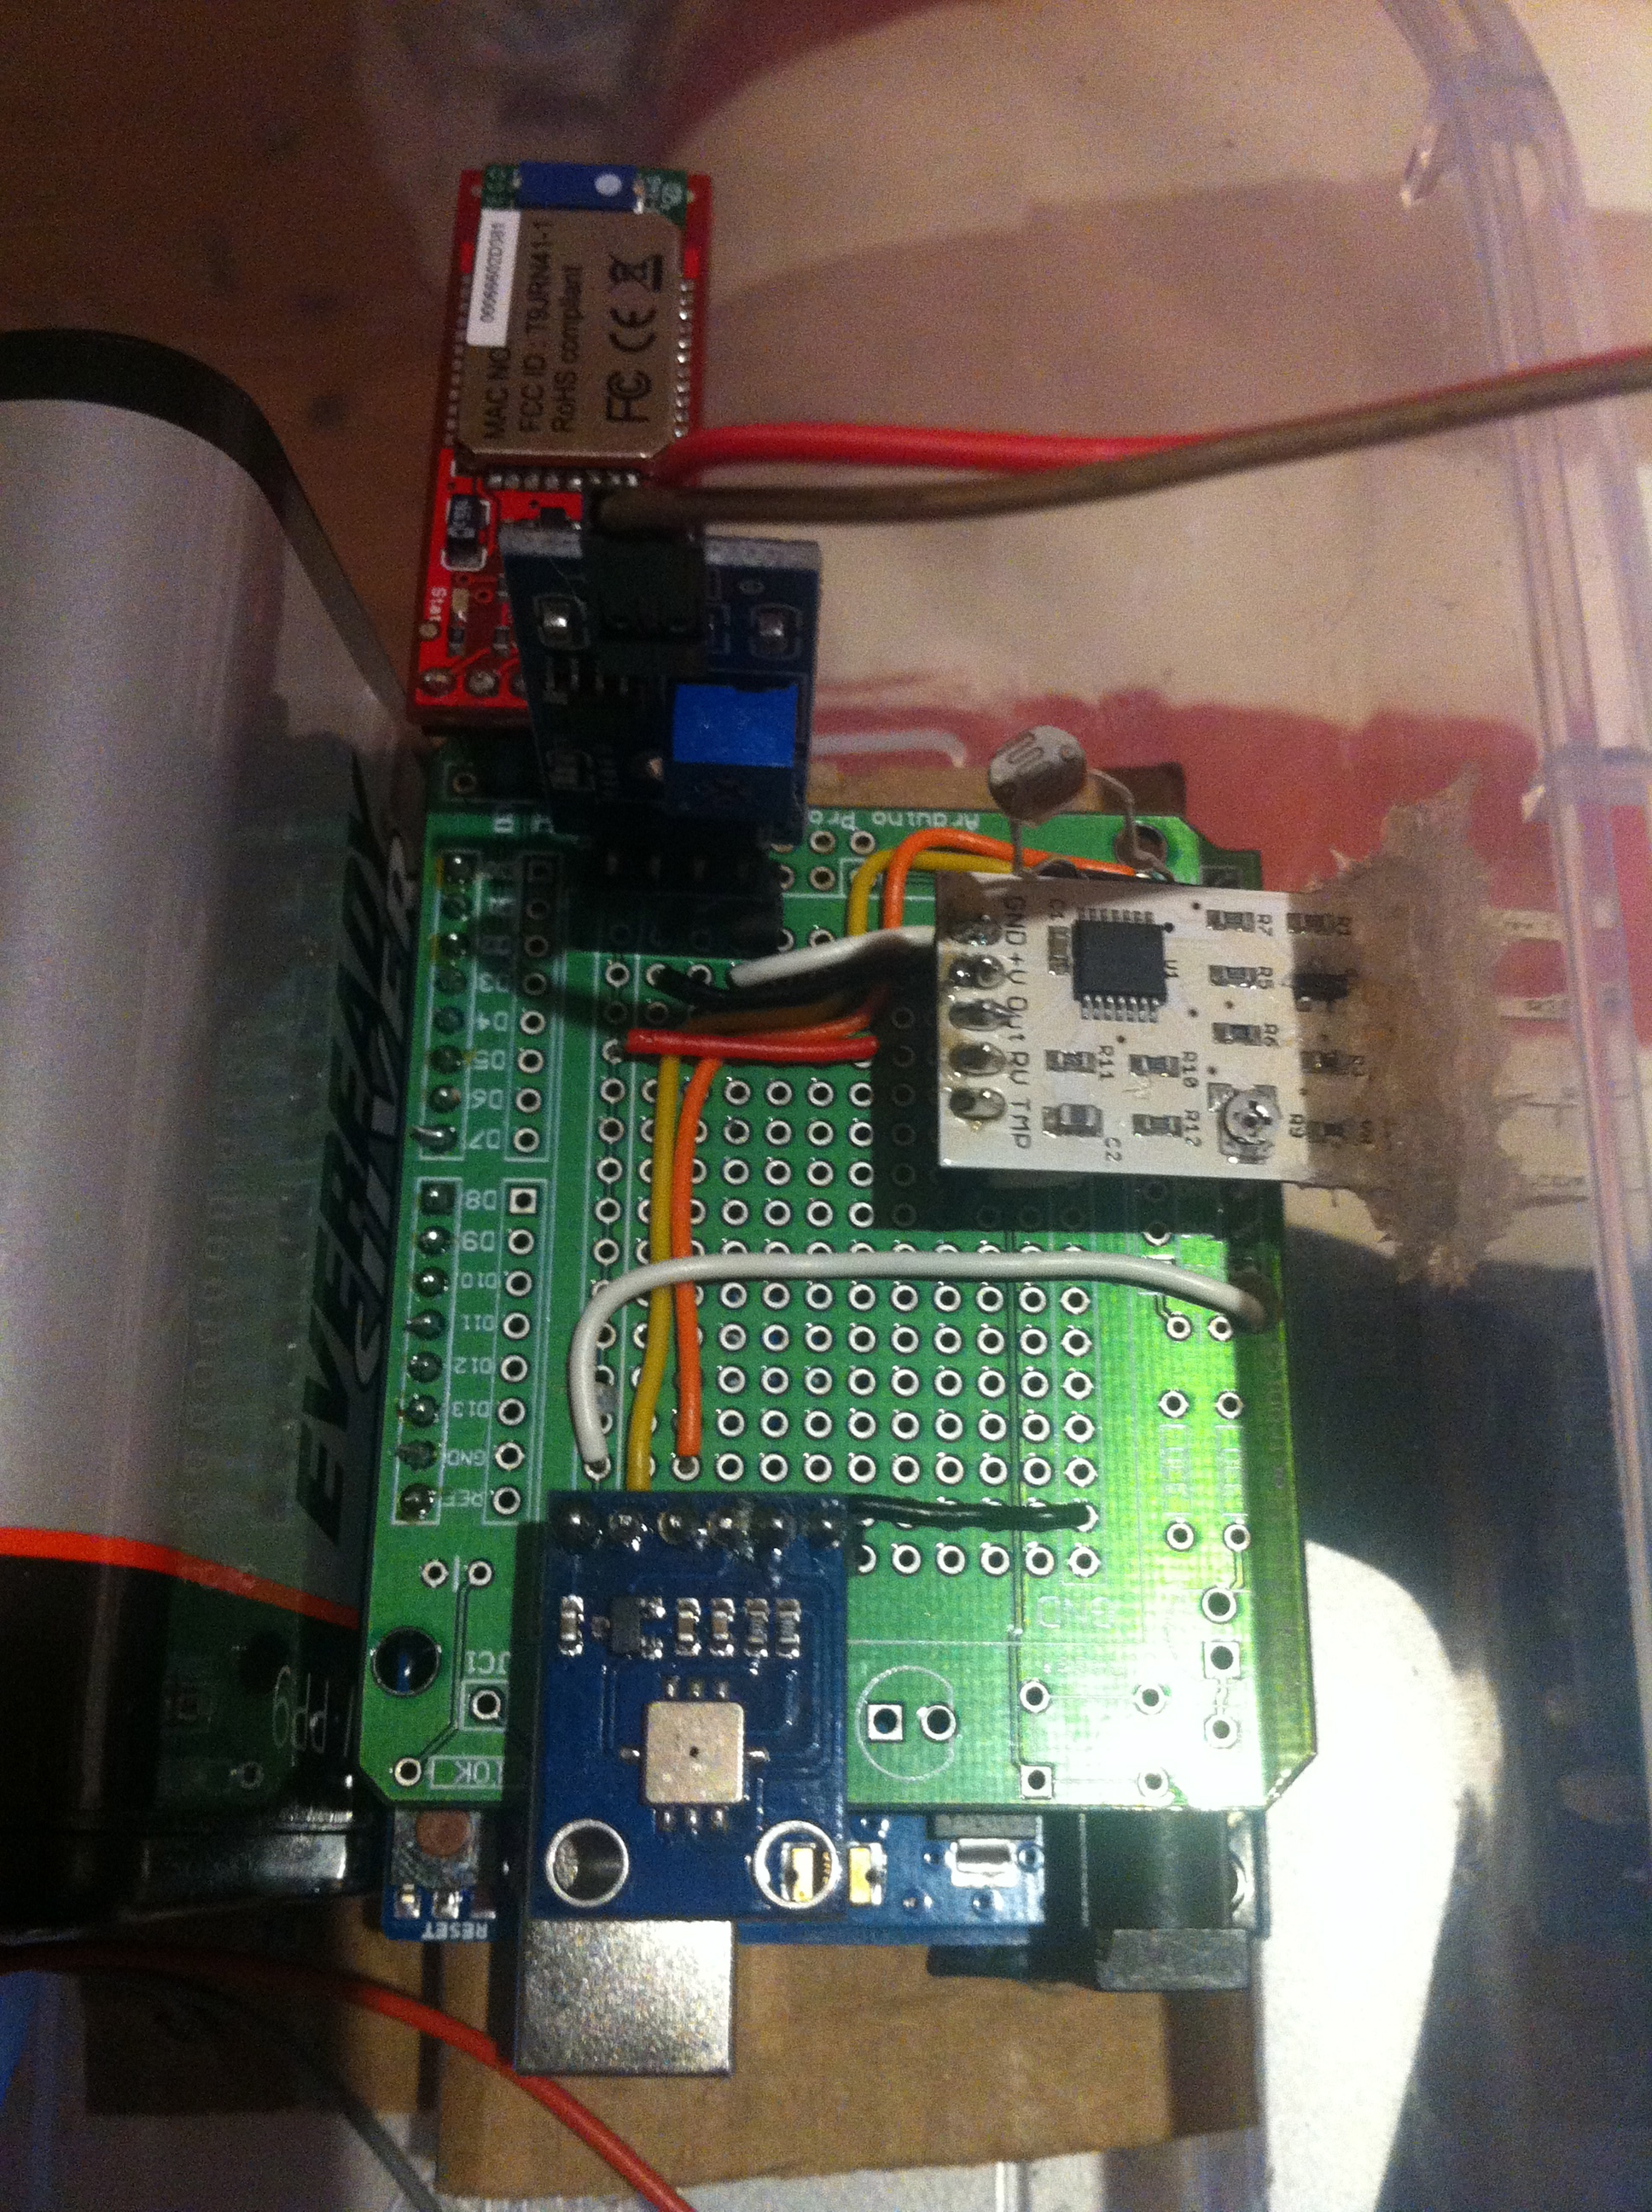
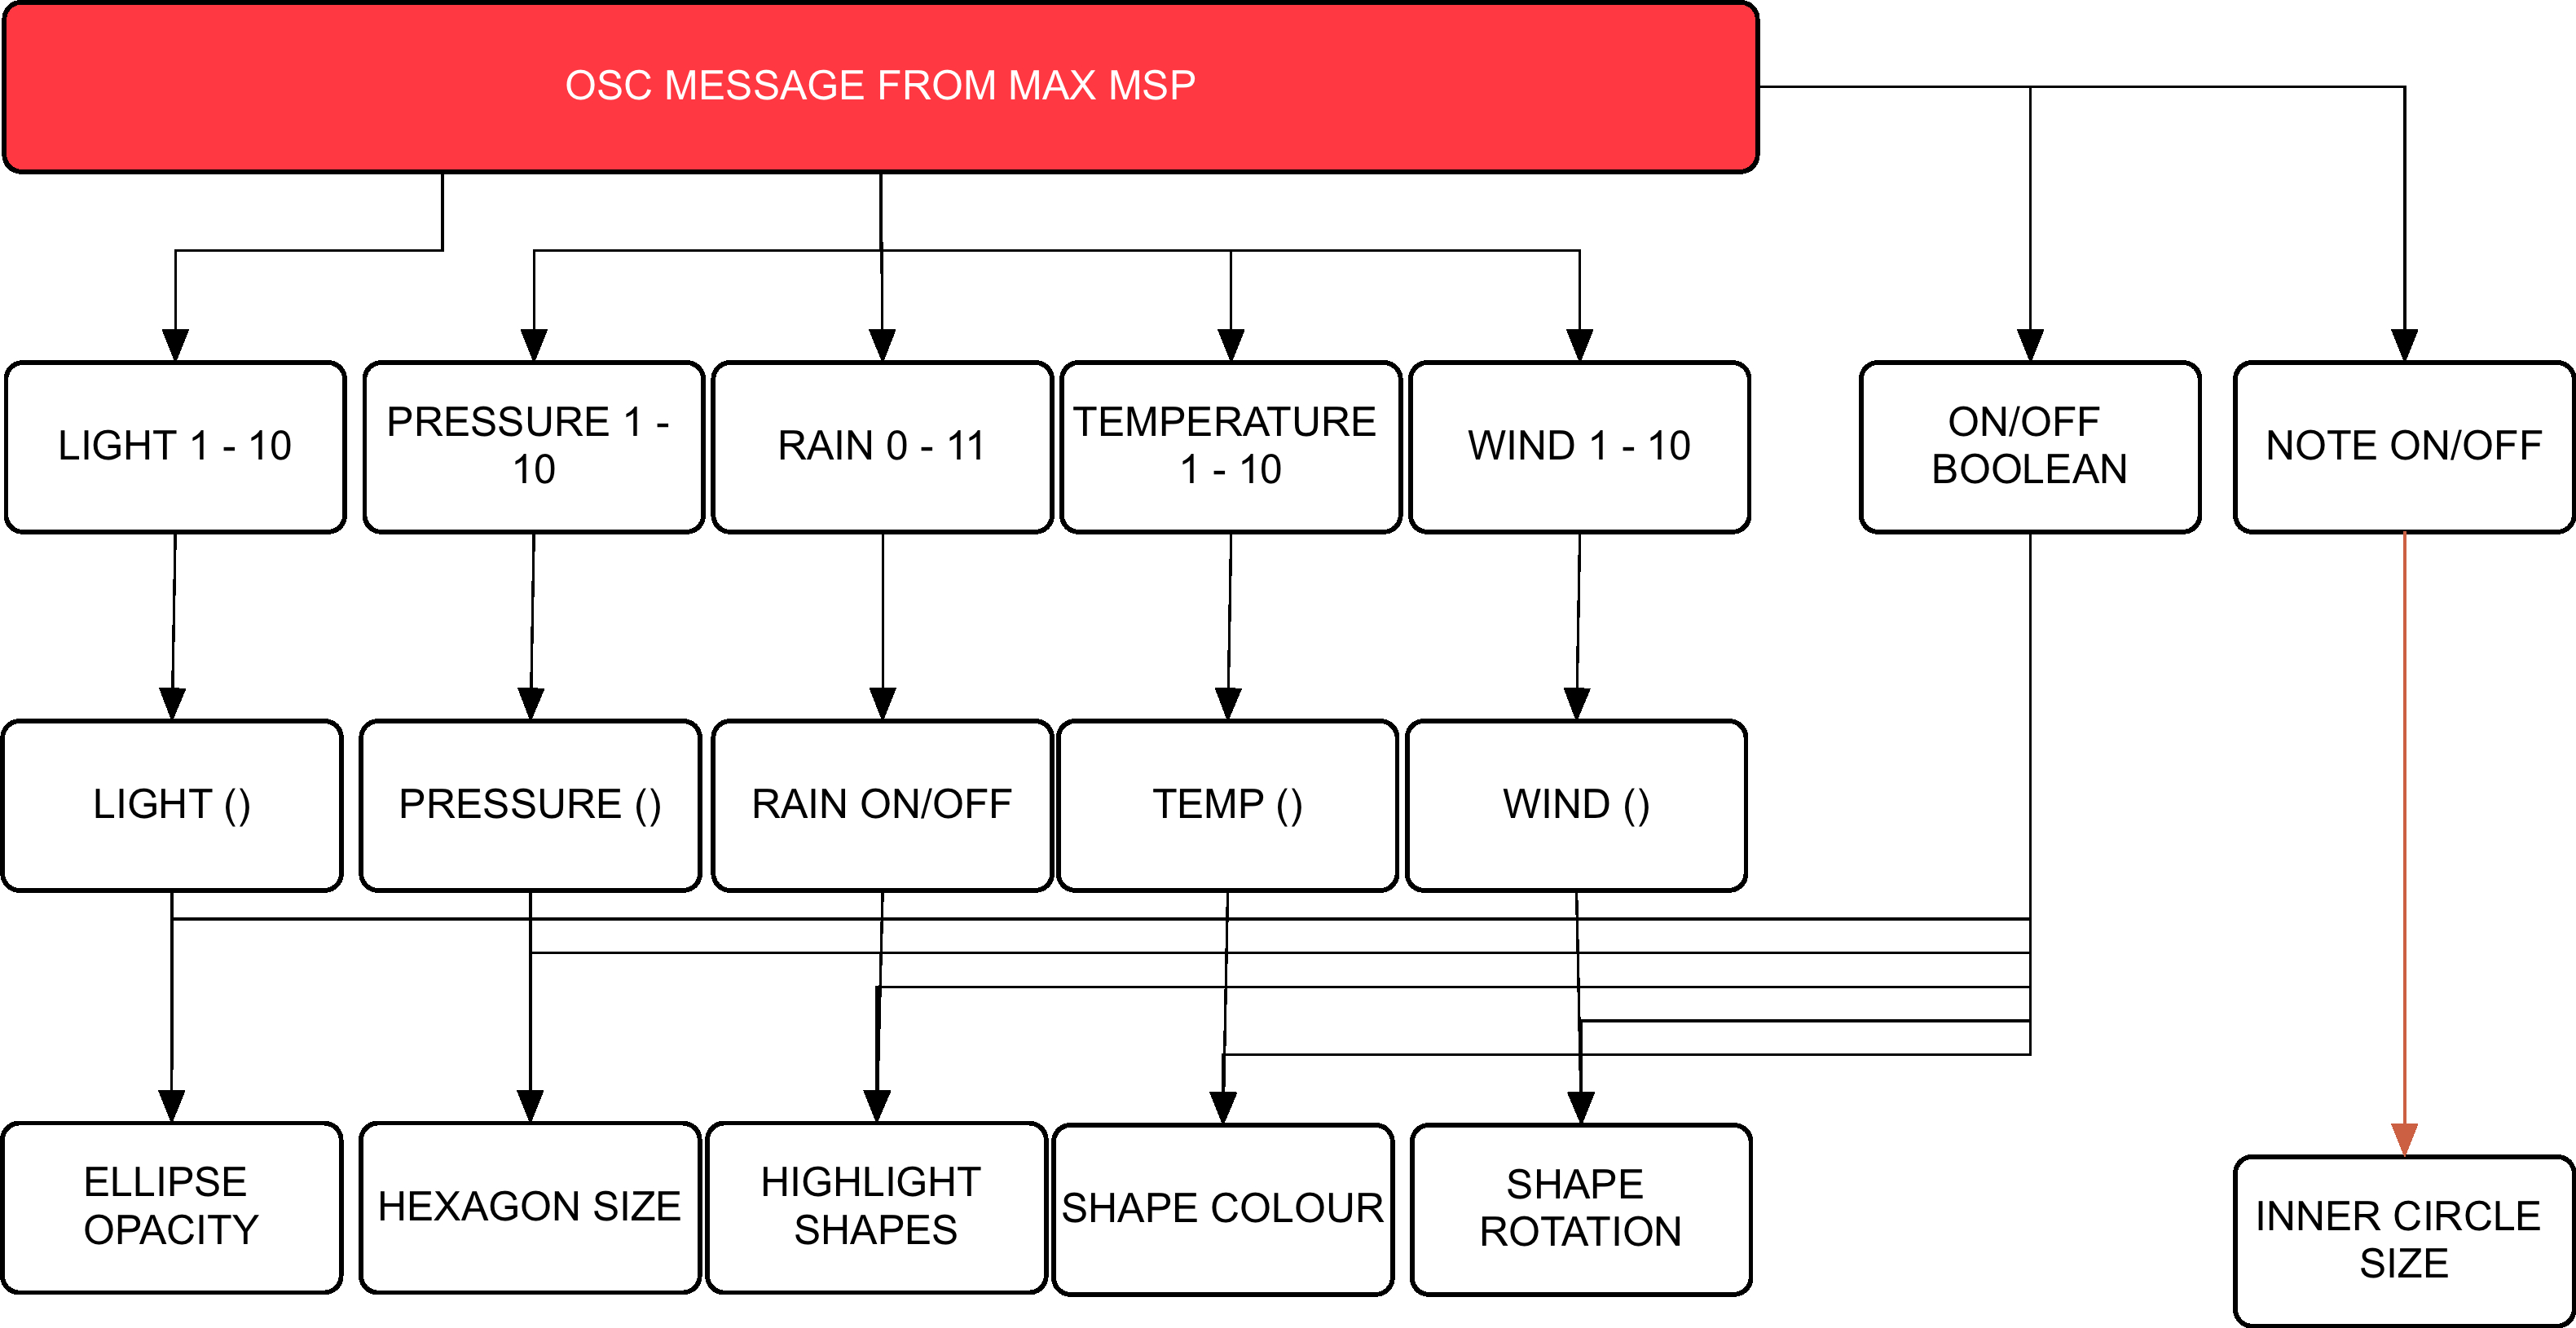
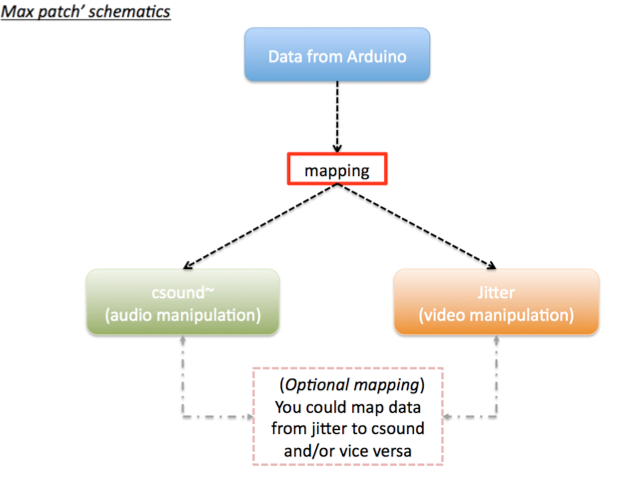
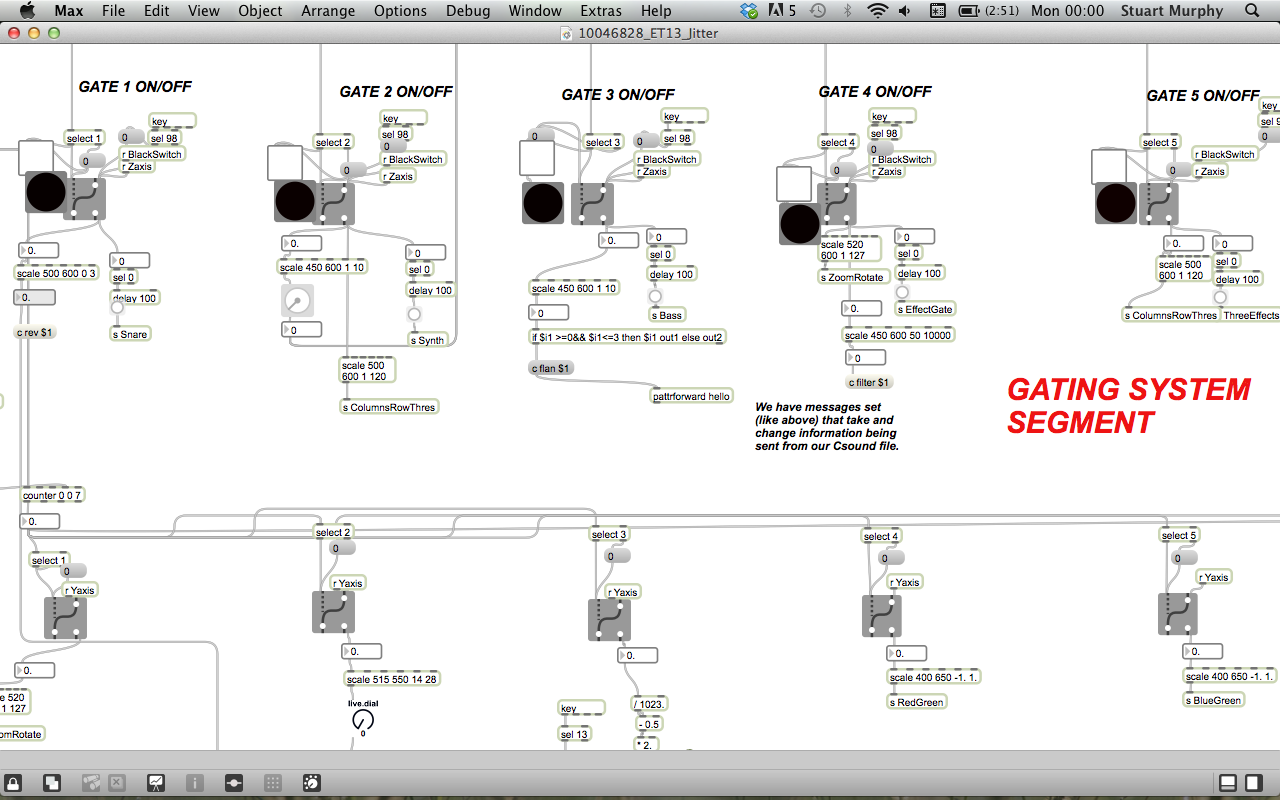
The project sees Arduino/Electronics, CSound & Jitter come together creating an audiovisual system to perform with. It enables live video manipulation and live control of CSound synthesis. We created a simple hand held box that contained two buttons, an accelerometer and an Arduino microcontroller. This gave us control over what was heard and seen i.e. the buttons could toggle through different states while tilting the boxed changed specific values in each selected state. We used referenced video loops to manipulate the visuals in Max MSP, we, however, created all the audio components ourselves within CSound through coding. This included the bass, kick and snare you can hear in the demo. How these sounds are triggered is determined within Max MSP based on the gating system I created to filter signals from the Arduino. The videos below give further explanation and you can click here to read our NIME style paper.
Our end product had the ability to:
Send sensor data from Arduino into Max MSP.
Enable the manipulation and control of audio and video using sensors through mapping techniques.
Run CSound in real-time via the Max MSP csound~ object. Audio material for CSOUND:
During my 1st year studying Media Programming, learning the basics of the Java language was foundational. We would practice different coding each week so we would become familiar with inputting data, why we were inputting it, what to expect and also how to troubleshoot errors we come across. Below I have taken screenshots of the three projects that made up part of our end term. The projects were a mixture of sound, using JMusic library, and user input. Click on the images below to see my work and explanation of specific segments of code.
Project 1:Within this project, I wrote a programme which used arrays, phrases, parts and scores to give a midi output. As seen in the image I first declare my variables. Phrase then sets the time I want the melody to begin. Part sets the instruments and channels I wish to use. Ultimately these all go to aScore. During this process I add modifications to each part to display what Jmusic is capable of.
Project 1 Source Code section
Project 2: In this second project, we once again used JMusic but this time we were to integrate a menu using JOptionPane.showInputDialog. When the user ran the programme, a menu would appear display options to select from. Depending on which number was selected, it would run this process. This programme was written to upload files and preform the task selected at the menu.
Project 2 Source Code Section
Project 2 Source Code Section
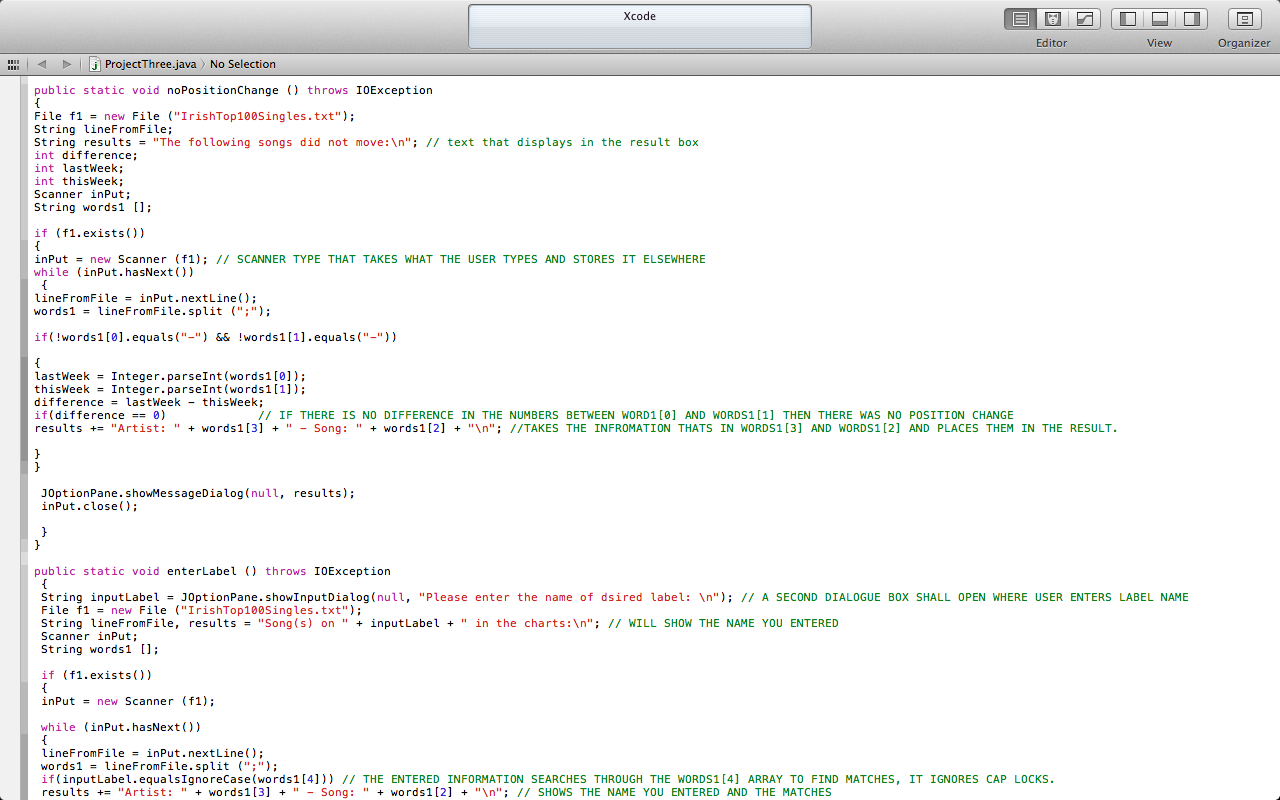
Project 3:Within this programme, a menu will appear to the user which will display a few options for them. The difference with this programme is that I imported a scanner. This means that Java will read the text files I have saved along with the programme and will calculate the outputs based on these text files.
The aim of the project was to create the basic pac man character using Processing. This Pac Man character was to resemble the one from the famous arcade game PacMan in both looks and movement. I created code in which the movement of the character would correspond to which arrow key we pressed i.e. if the up key was pressed, the character would move up. Once I had successfully assigned each key an instruction, the difficult part was getting PacMan mouth to open/close and also have it facing in the correct direction when moving. It took me awhile to figure out where certain statements would be best allocated in the code and also size and colour settings of the character After much trial and error I was capable to perfect the code and my project was a success.
Within this project :
I enhanced mr programming skills in Processing with regards to if statements, booleans, key inputs and more
Broadened my knowledge with regards to writing code for user interactivity.